HOW TO HEAT PRESS A CAP
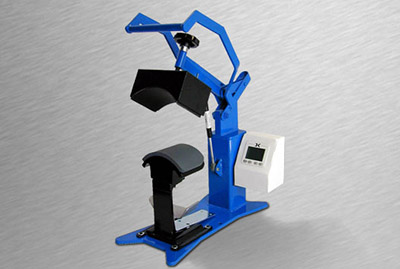 George Knight DK7
Heat presses are machines that use heat and pressure to apply graphics, and are a great solution for printing on caps. This page provides some tips to get you started with heat pressing on caps on many types of heat presses, including Geo Knight presses.
Caps can be printed with both clamshell (vertically opening) presses and swing-away (sideways opening) presses. You can print using cap attachments on a combo heat press, or a specialty heat press made exclusively for caps. Ideal settings vary with specific materials, so be sure to check with the manufacturer or your press to make sure your press can be set to the proper temperature for the cap you want to print. The George Knight DC-CAP attachment with curved heating block for Digital Combo presses and the DK7 are both great solutions for heat-transfer printing onto caps.
A special type of paper called "heat transfer paper" is often used as the medium for transferring an image to your cap. To use transfer paper, the first step is to get the image you'd like onto the transfer paper. Typically, you'll need to reverse the image (make it mirror image) using image-editing software. Check to see what kind of printer ink is best for the material you are printing on and your transfer paper. It sometimes helps to trim the paper (a utility knife or scissors should do the trick) so only the artwork you want transferred onto the cap remains.
Turn your heat press on, and set it to the proper heat and pressure settings. Ideal settings vary with specific materials and inks, so be sure to check with your heat press and ink manufacturers to determine how hot to set your heat press, and how long to press the cap. Once the press has heated up, load your cap onto the heat press. Take care to smooth out any wrinkles, and lint roll the printing surface of the cap to ensure it is totally clean. Some manufacturers recommend pre-pressing the cap by placing a sheet of protective paper on top of the cap, and closing the press for a few seconds to warm up the cap. If you do that, be sure to remove the paper afterward. Position your artwork face-down on the cap, and hold it in place with an adhesive such as ProSpray. Be sure the side with the ink is in direct contact with the cap. Often, it is next recommended to place the protective paper on top of the transfer paper.
Now you're ready to go ahead and press to transfer the artwork onto your cap! When your cap has been pressed for the proper amount of time, remove your cap, and set aside to cool. Follow any instructions specific to your transfer paper when removing the transfer sheet.
Visit our Learn page for more information on heat pressing, or feel free to Contact Us with any questions or requests for special projects. We would be pleased to provide a solution.
Learn more about the DK7 and DK7T from George Knight.
To learn more about or to buy George Knight heat presses, visit HeatPress.com.
|